You get home tired, open the fridge, and need dinner that won't wreck your calories, your protein target, or your patience. Yellow rice and black beans solves that problem fast, because it's filling, adaptable, and easy to portion for a week of lunches without getting boring. It's also a dish with real depth, since black beans and rice trace back at least 7,000 years in Central and South American diets, later blending with Asian rice through colonial trade routes (Michigan State University Extension).
That history matters because the meal isn't just comfort food, it's a durable template. A bowl can stay simple for meal prep, or it can carry extra seasoning, vegetables, or protein without falling apart. The same base works for busy weeknights, gym lunches, and trackable meals, which is why it keeps showing up in my own rotation.
Introduction to Yellow Rice and Black Beans
A weeknight version of this dish usually starts the same way, with a pan on the stove, a bag of rice, and a can of beans pulled from the pantry. The appeal isn't fancy technique, it's control. You get a meal that feels complete, tastes layered, and can be broken into repeatable portions without much guesswork.
The dish also sits in a broader food tradition that's bigger than any single recipe card. Rice-and-bean combinations became especially important across Latin America and the Caribbean after colonial-era rice movement met indigenous bean traditions, and that long overlap explains why the pairing keeps resurfacing under different names in different places (Michigan State University Extension, Adventure Tours Costa Rica). In other words, this is a pantry meal with a real lineage.
Practical rule: if a recipe has to do two jobs, feeding you well and fitting your macros, make the bean texture and the serving weight non-negotiable.
For people who want the weight-loss side of the equation to stay realistic, it helps to think about the plate as a logging problem too. If you're using black beans as part of a calorie-aware routine, this breakdown on black beans and weight loss is worth keeping nearby because the bean portion can help or hurt your log depending on how loosely you scoop.
The key advantage here is flexibility. A single pot can become a base for chicken, tofu, avocado, eggs, or a clean vegetarian bowl, and the leftovers reheat well enough that meal prep doesn't feel like punishment.
Ingredient List and Prep Essentials
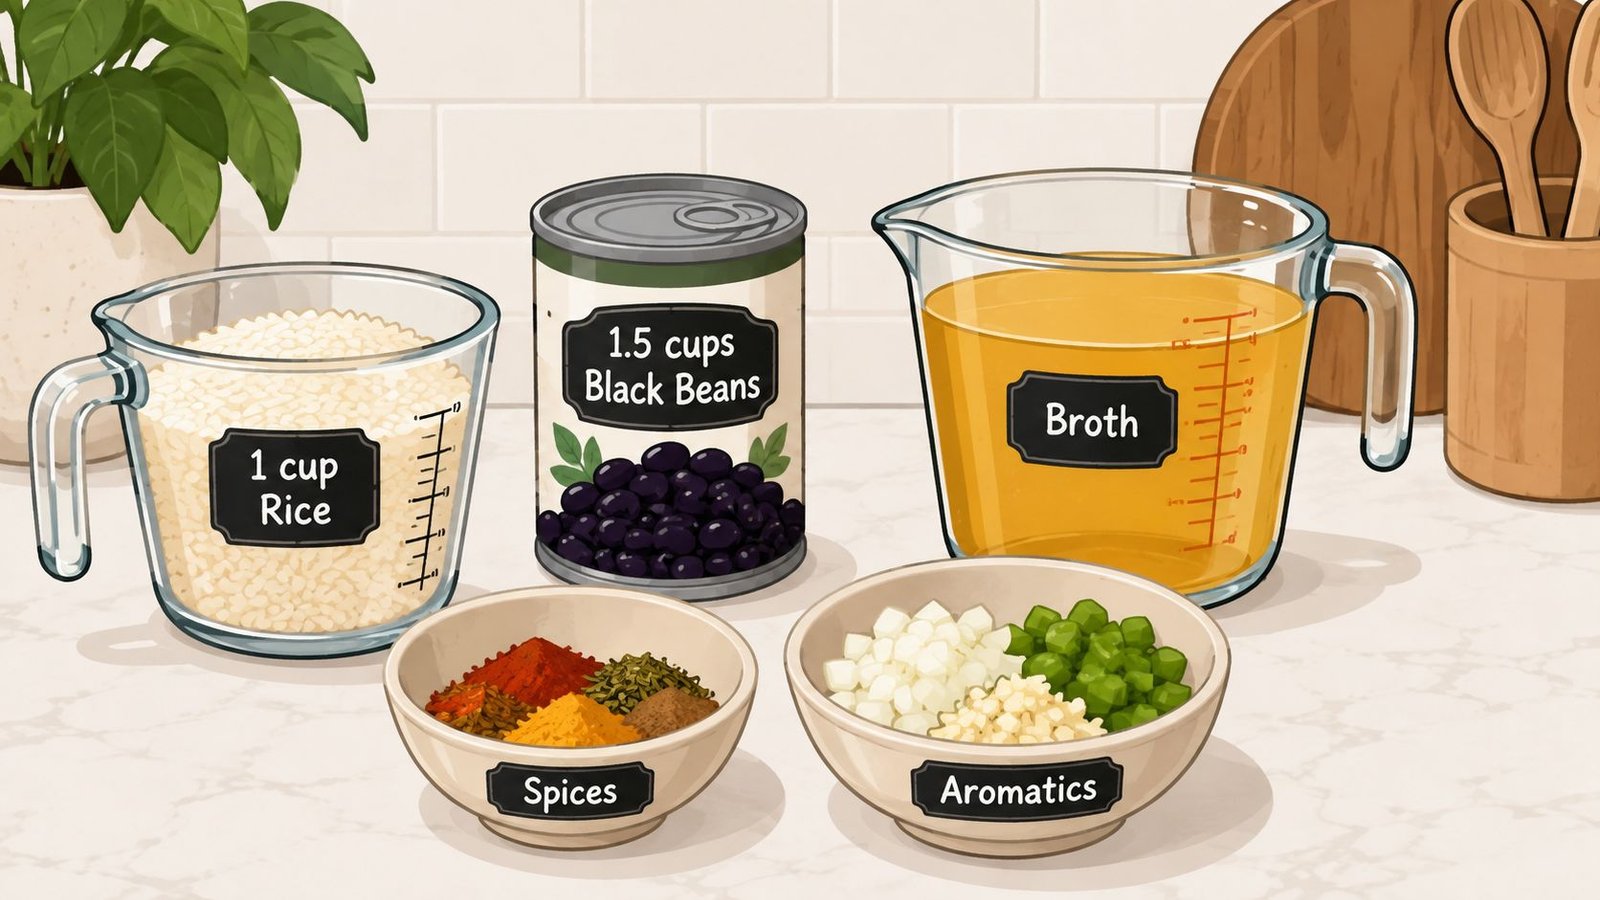
Start with a simple structure. Use 1 cup long-grain rice, 1 can black beans or about 1.5 cups cooked black beans, plus onion, garlic, turmeric or a yellow spice blend, salt, broth, and oil. The exact spice mix can vary, but the core job is the same, building a savory rice base that turns golden without turning greasy.
What to prep before the pan heats
If you're using canned beans, rinse and drain them, then season lightly so they don't taste flat. If you're using dried beans, plan ahead, because bean tenderness is the bottleneck, not the rice. One cooking reference recommends an 8 to 24 hour brine or a one-hour covered soak, while canned beans remove that long bean timeline from the rice's shorter cook window (Lineage Culinary).
I like to keep the prep angle brutally practical. Chop the onion, mince the garlic, measure the rice, and keep the broth hot so the pan doesn't lose momentum. A sharp chef's knife makes the whole process calmer, and if you're comparing tools, learn about Japanese knife types and steel from Blade Master before you buy another dull “all-purpose” blade.
The rice cooks cleaner when the liquid is ready before the rice goes in. That small habit keeps you from over-stirring while the starch is setting.
For seasoning, don't under-salt the bean side just because the rice is yellow. A bland bean layer makes the whole bowl feel heavier than it should. If you like using bouillon for faster flavor, this guide on how to use bouillon cubes can help you keep the broth savory without making the whole pan taste like a cube.
One-Pot and Stovetop Cooking Methods
The cleanest version starts with a choice, convenience or control. A one-pot method lets you layer aromatics, rice, beans, and broth together and walk away sooner. The stovetop method gives you more texture control, which matters if you've ever pulled apart a bowl that went from fluffy to gummy in one extra stir.
One-pot method
Heat oil, soften the onion and garlic, then add the rice and spices so the grains get coated before liquid hits the pan. That coating step matters because it helps separate the grains later instead of letting them fuse into a dense mass. Add broth and beans, bring it to a gentle simmer, then cover and cook until the rice is tender and the liquid is absorbed.
This path works best when your beans are already fully cooked or canned. If dried beans still need to finish while the rice is cooking, the rice usually loses the race and the pot gets uneven.
Stovetop method
The more controlled method starts with the rice stage on its own. One practical approach is to pre-boil the seasoned liquid, add the rice, simmer uncovered for about 7 to 10 minutes, then fold in the beans and finish covered on low heat for 20 to 25 minutes with one gentle stir halfway through (Cook2EatWell).
That structure prevents two common failures at once. You avoid gummy starch from aggressive stirring, and you avoid split beans from letting them bubble too hard for too long. The rice should still look a little saucy when you add the beans, because the covered finish tightens everything into a cohesive bowl.
Texture check: if the top looks dry but the bottom still has moisture, lower the heat before you touch it. Stirring too early usually causes more damage than a minute of patience.
For dried beans, the rhythm changes. Some preparations call for a long soak or a covered soak before a lengthy simmer, and the practical reason is simple, beans need time to become tender enough to survive contact with the rice window (Lineage Culinary). If you don't want to think that hard on a Tuesday night, canned beans are the easier route.
The version I'd use for weekly meal prep is the stovetop method, because it gives you cleaner portions and fewer surprises when you reheat the leftovers. The one-pot version is fine for speed, but it's less forgiving if your beans are soft or your heat runs hot.
Logging Nutrition with PlateBird

Logging this meal should feel as quick as serving it. Start by entering yellow rice black beans in the text field, then pick the serving weight that matches the bowl you ate. That's the key move most recipe pages skip, because a log based on a vague scoop never matches the kitchen reality.
A campus dining label for Yellow Rice, Black Beans & Corn lists a typical bowl at 248 kcal, with 42 g carbs and 7 g protein (Princeton Dining). That's useful as a reference point, but it also shows why the same dish can drift depending on oil, rice amount, bean ratio, and add-ins. Home bowls and cafeteria bowls aren't interchangeable, so portion weight matters more than guesswork.
A fast logging workflow
Use the text entry first when you know the portion size. Type the meal, match it to the bowl weight you served, and save it as a repeatable entry for meal prep days. If you photographed the bowl instead, confirm the rice and bean quantities before you trust the estimate, especially if you added avocado, chicken, or extra oil.
The true win is consistency. Once the bowl size is documented, future lunches take seconds instead of becoming another “close enough” log that throws off the day. For a more direct workflow around recipe logging, the recipe calorie calculator app is the right starting point if you want the math to stay tied to your actual serving.
Don't log the recipe, log the portion you put in the container. That's the difference between a useful tracker and a rough guess.
Dietary Variations and Batch Meal Prep
Small changes can shift the dish toward a very different goal. For a vegan version, use neutral oil and vegetable broth, then lean on garlic, cumin, onion, and herbs for depth. For a lower-sodium version, reduce added salt and let spices carry more of the flavor. If you need more protein, add tofu or shredded chicken after cooking so the rice texture stays intact.
When I'm mapping a prep plan, I think in containers, not in recipes. That means choosing a base batch size, portioning it immediately, and keeping the log tied to the container label rather than the pot. If you're looking for broader vegetarian structure, resources for plant-based protein cooking from Just Cook It can help you build the bowl around the beans instead of treating them like an afterthought.
| Variation | Calories | Carbs (g) | Protein (g) | Fat (g) |
|---|---|---|---|---|
| Home bowl reference | 248 | 42 | 7 | Not provided |
| Cafeteria-style label reference | Not provided | Not provided | Not provided | Not provided |
| Vegan version | Not provided | Not provided | Not provided | Not provided |
| Higher-protein version | Not provided | Not provided | Not provided | Not provided |
| Lower-sodium version | Not provided | Not provided | Not provided | Not provided |
The table stays intentionally sparse because the verified data doesn't give a full macro grid for every variation. That's fine in practice, because the useful move is not pretending every bowl is identical. It's choosing the version that fits your kitchen and then logging the actual portion you packed.
If you batch-cook, make each container look the same. Same spoon, same level, same lid, same label. That way, the next four lunches are easy to log without opening the app and renegotiating your own memory.
Storage Reheating and Serving Suggestions
Cool the rice and beans quickly, then portion them into containers before they sit around the counter too long. Label each one with the date and the portion you packed, because the container is doing double duty as both storage and your logging reference. The dish handles crowds well, which is no surprise when a 2009 Costa Rican event fed 50,000 people using 2,640 lb of beans and 3,300 lb of rice (Adventure Tours Costa Rica).
For reheating, add a teaspoon of water if the rice feels tight, or a little oil if you want the grains to loosen instead of clumping. A skillet gives you better texture than the microwave, but the microwave still works if you reheat gently and stop before the edges dry out. Keep the lid slightly vented so steam can move without turning the bowl soggy.
Leftovers taste better when they're reheated like rice, not like soup.
For serving, simple extras carry the bowl a long way. Sliced avocado gives it richness, a dollop of Greek yogurt cools the seasoning, and a side salad cuts through the starch. If you want another storage reference that applies the same airtight logic to pantry items, this guide on best ways to store coffee is a useful reminder that sealing food well protects flavor longer.
If you want meal prep that's faster to log and easier to repeat, try PlateBird for your next batch of yellow rice and black beans. It helps you match your real serving weight to your macros, so you're not guessing at the end of a long day. Visit PlateBird and make the next bowl easier to track than it was to cook.